How To Build A Barn Door Headboard
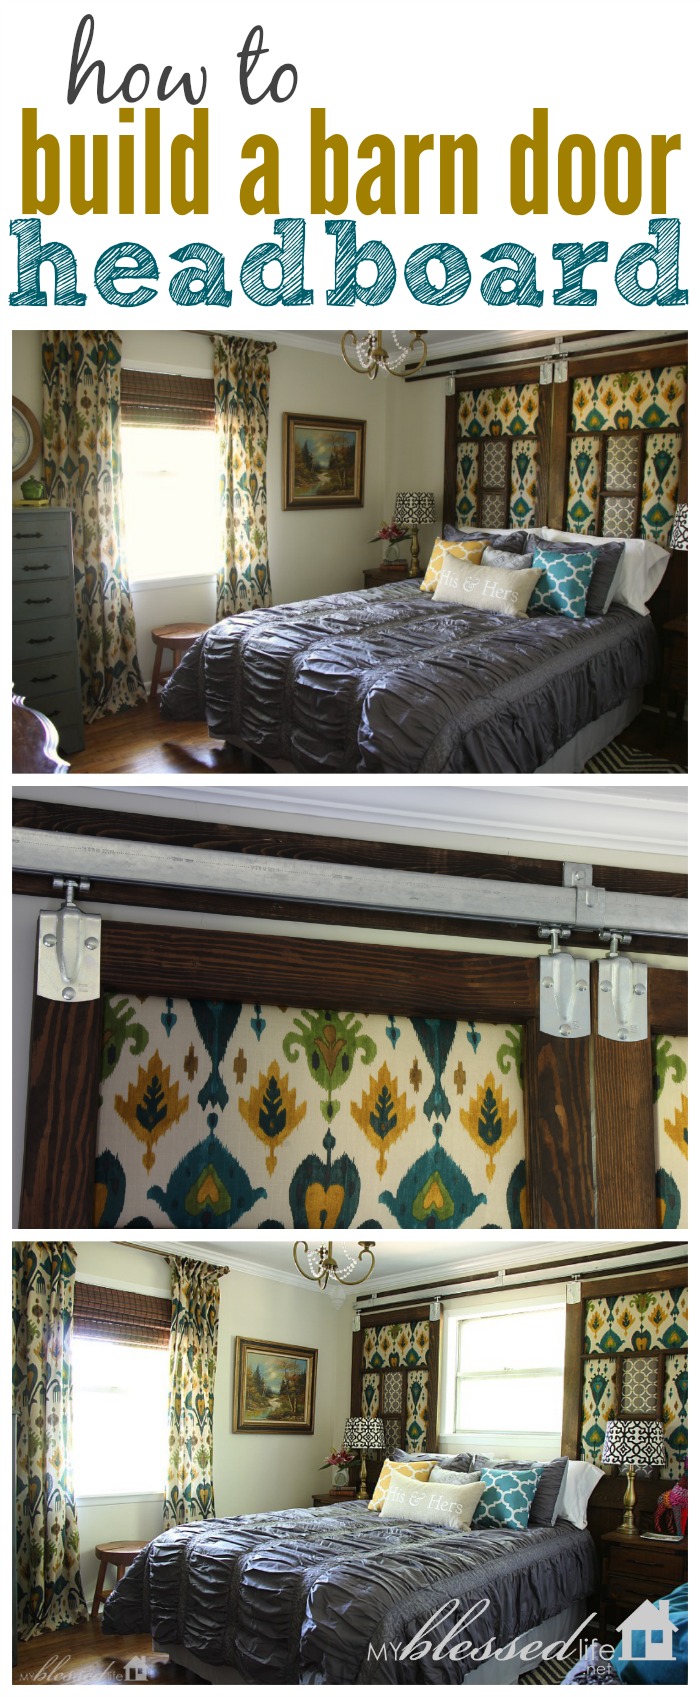
Hey, hey! I’m so excited to show you this simple, yet stunning tutorial today! As most of you probably know we created a moving barn door style headboard for our industrial-glam master bedroom makeover.
This project was SO simple to do. I’m not kidding. Let me show you how!
[pinit count=”horizontal”]
I love, love, LOVE our room. And we love the moveable headboard that can cover the pesky window over the bed or flank the window during the day.
Pretty, pretty!
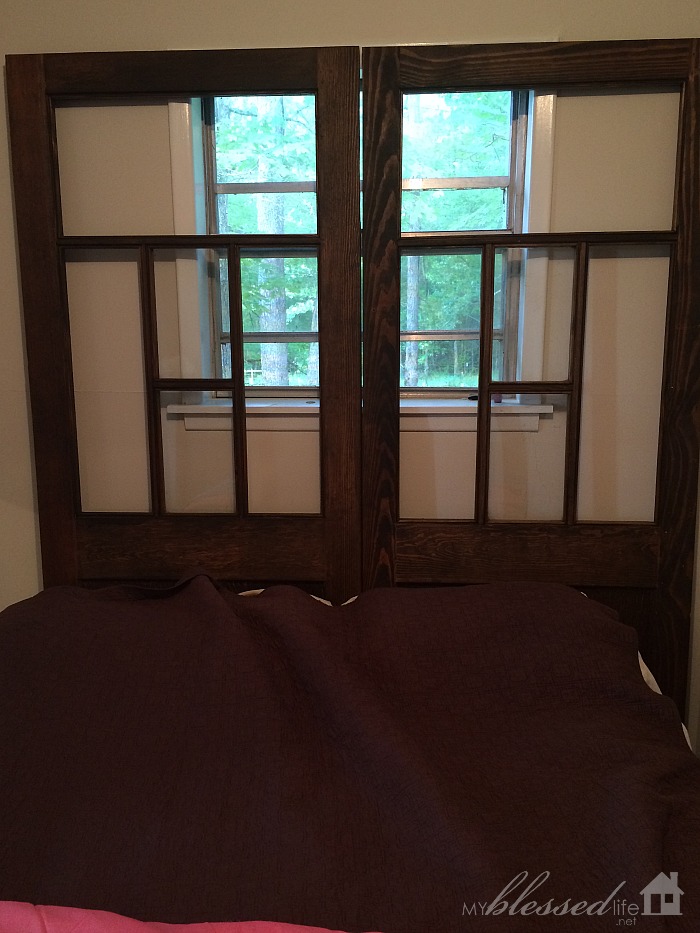
Step 1: Find doors.
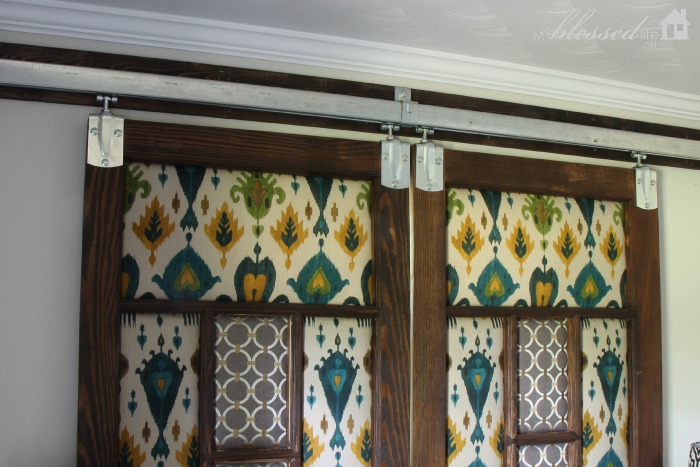
The doors we used are from Southern Accents Architectural Antiques. They stripped the doors for me and we stained them. Easy peasy. You could also look at ReStores or antique stores for old doors.
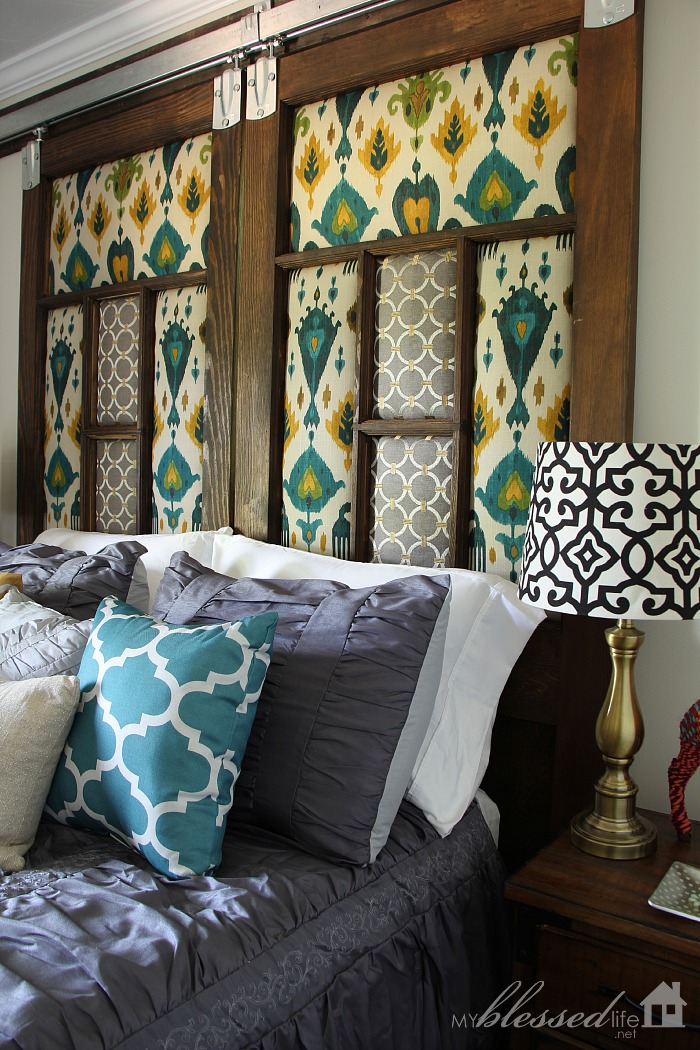
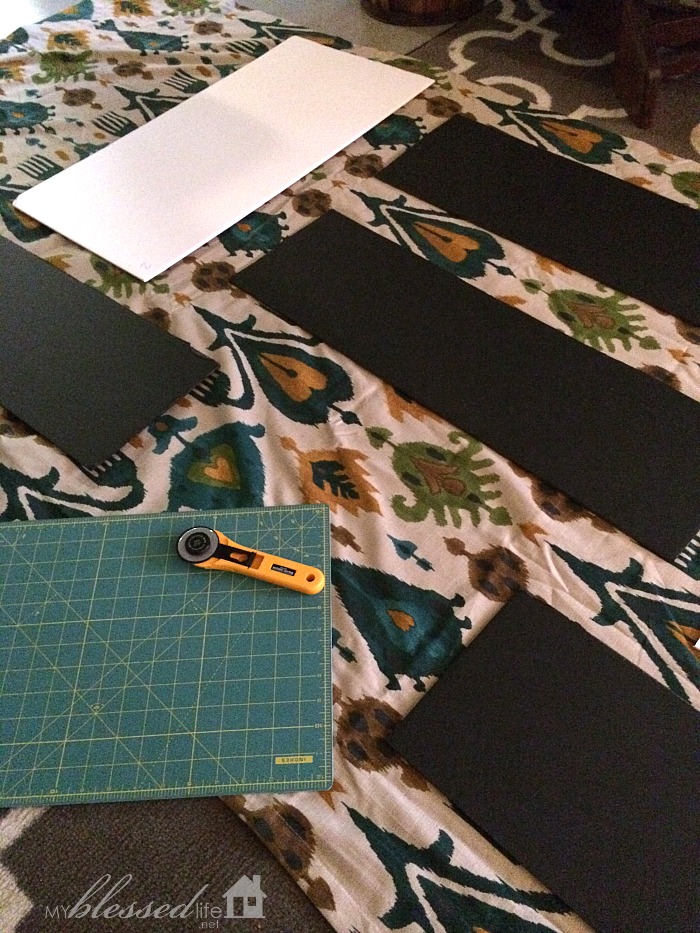
Step 2: Upholster door panels if desired.
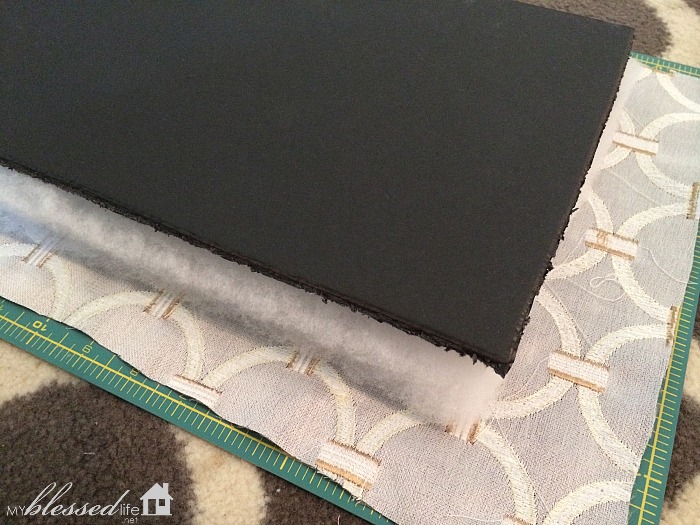
I cut foam board to fit the window panels in the door. Then I cut quilt batting the same size and fabric to fit around the foam core.
I used hot glue to secure the fabric in place. Then I stapled the fabric covered foam core to the back of the doors.
Step 3: Install the door track.
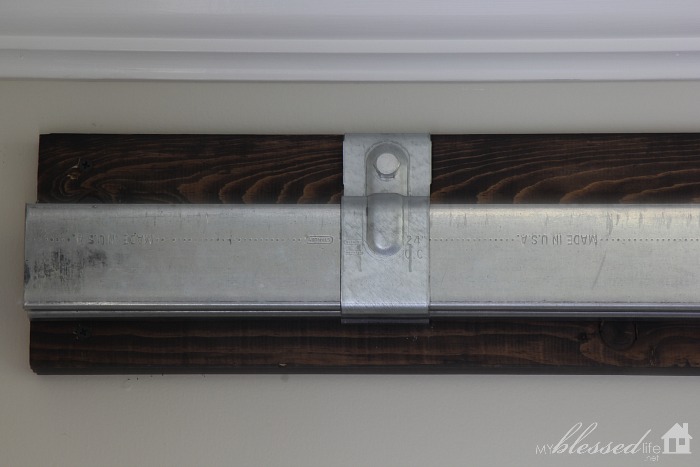
We stained a 1×6 board to match the doors. Then my husband screwed the board very securely into the studs. That way we could hang the track brackets symmetrically without worrying about making them absolutely secure.
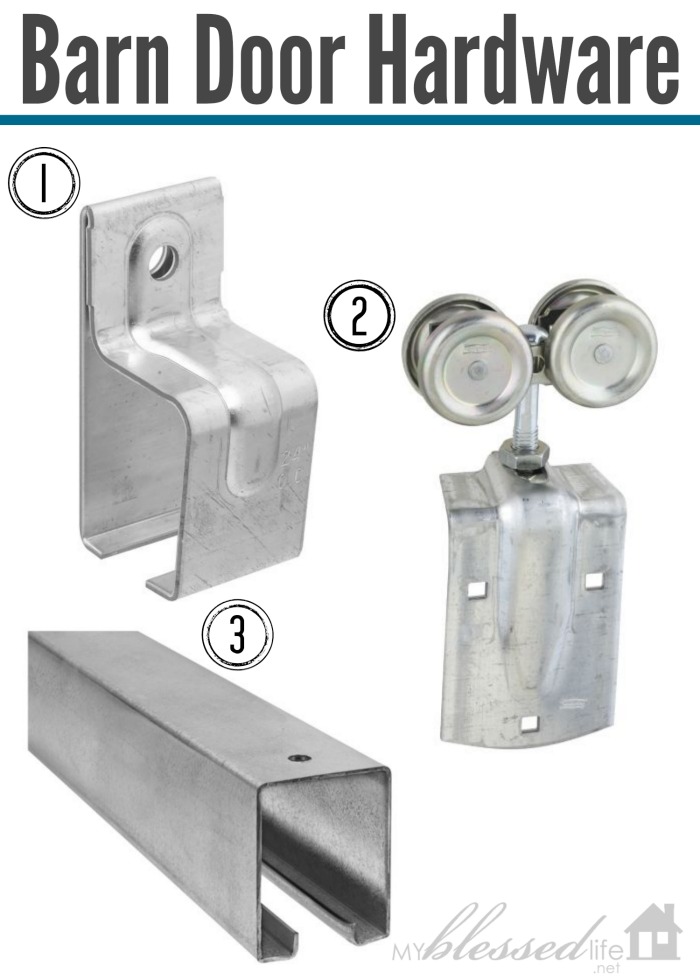
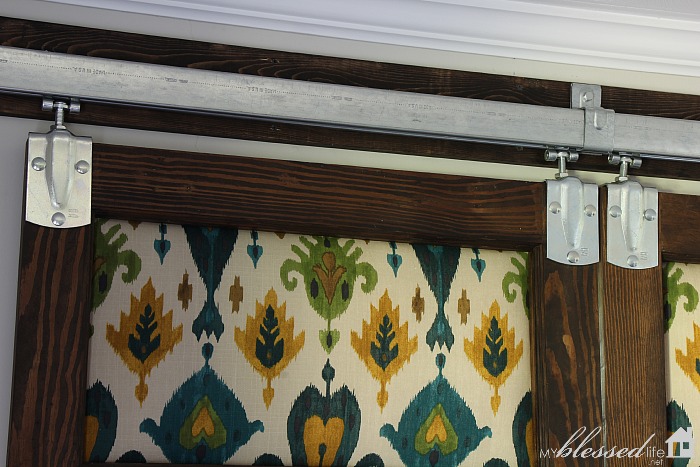
Here is the hardware from Tractor Supply that you need…
1. Galvanized Single Bracket – We used three!
2. Zinc Box Rail Hanger – We used four. Two for each door!
3. Galvanized Box Rail – We cut a 12″ length down to fit our wall…same length as the 1×6 stained board.
After the stained board was installed, we evenly spaced the brackets on the rail {and made pilot holes} before screwing them in place. Obviously I held up the rail while Ernie screwed in the brackets. 😉
Then Ernie pre-drilled holes in the doors for each hanger. That way it was super easy to hold the doors up and quickly get the bolts and nuts in place.
When I say that this project was simple, it truly was. We don’t do terribly complicated around here! 🙂
{Ernie just said, “If you’re looking for terribly complicated, please click here for the bathroom remodel.” HA!}
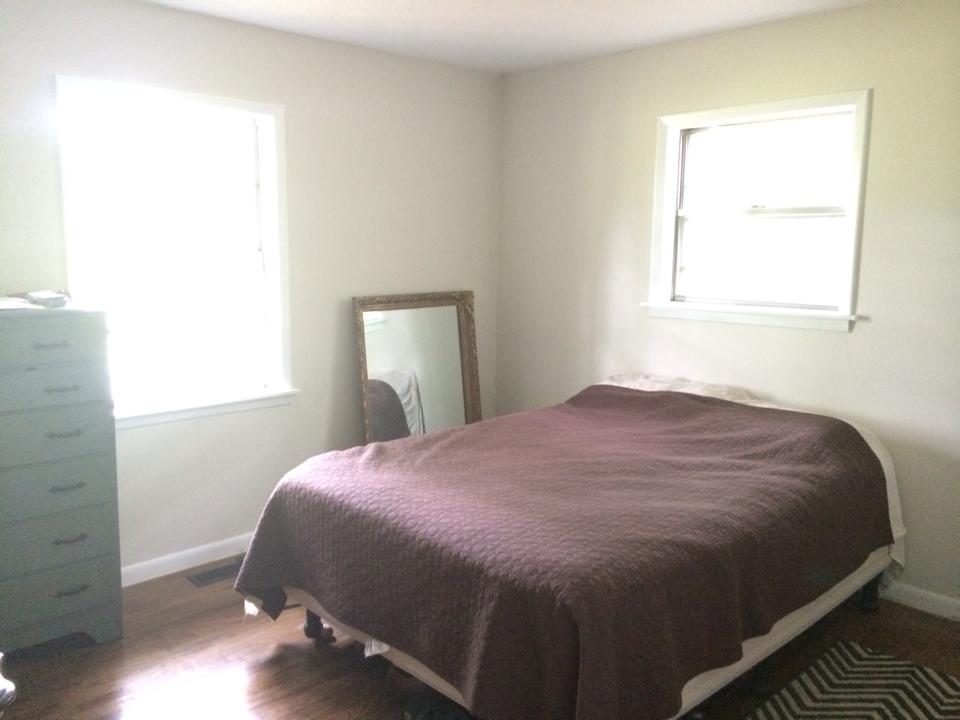
In case you haven’t seen the before, here it is…lovely iPhone photo. 🙂 That window over the bed was my nemesis because I wanted the bed to be the focal point…not the window.
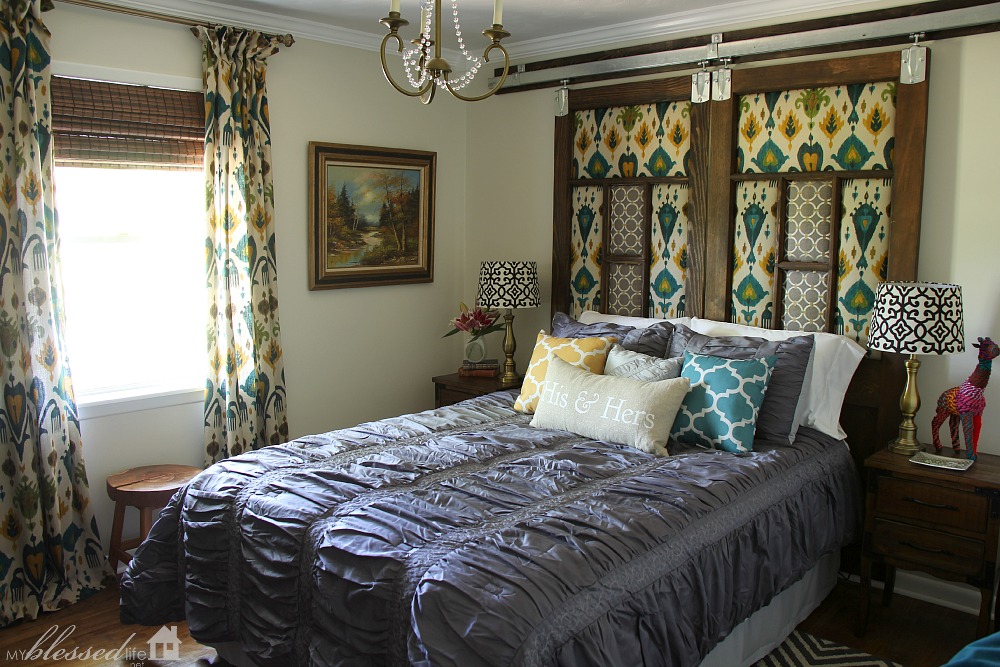
Mission accomplished. Doors closed.
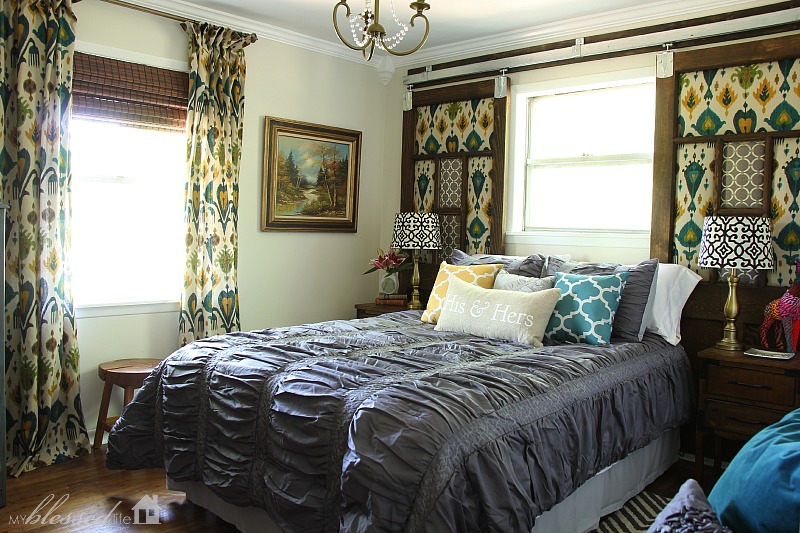
Doors open.
In the morning, I love to open the curtains…er, the doors and let the beautiful sunshine stream in! I can even open the doors while I’m still in bed. Ha!
Now, go forth and make your own barn door style headboard on a track! 🙂
Do you have a space in your home where you could use the concept? You could use it for an actual door or create your own headboard like we did. 🙂 I would love to hear your thoughts in the comments below!
xoxo
Myra

Love the headboard/window treatment!… Have to admit, I’m not a big fan of the bed covering. …it reminds me of those puffy winter jackets from the 80’s!…..but, vive la difference!
Myra, your barn door headboard looks wonderful! That was a brilliant solution of how to deal with the window above your bed. You’ve taken what would have been a problem and turned it into a huge asset. Way to go, girl! And thanks for sharing the instructions of how to do it!
Richella @ Imparting Grace´s last blog post ..Some Thoughts on Flag Day
Brilliant, Myra! I love the way it all came together so beautifully! 🙂
Love the idea…we also want to add barn doors to our decor! The quilt on your bed reminds me of the dress that the mom in the Munsters wore, but I do see the 80’s jacket too. Maybe you should have a column called what does my bed spread remind you of?? It’s funny how we all see something different. It looks cool on your bed also. I’ll have to check back to see what else people are saying. And I also thank you for the how-to instructions.
Toodles, Barbi
The doors you used were they solid wood? I have inherited the HEAVY solid wood doors from my husband’s childhood home and have been searching for a neat project for them. This would be awesome in our bedroom, but I’m hesitant because of the weight of these doors. Thanks!!! Yours look awesome!
Margaret´s last blog post ..Mean Girls
Hi Margaret! Yes! They are heavy wood doors! 🙂
Yeah! Thanks for letting me know. I am super excited…hubby not so much 😉 I did want to say that I found that the hardware on Amazon was a bit less expensive than our local TS.
Margaret´s last blog post ..Mean Girls
For a heavy for you could put wheels on the bottom so the weight is on the bottom and the top acts as a guide only. I’ve seen plans for fabric covered stricken cornices.. Maybe that could help.
For my application, i have two windows on one hall… Husband works nights so this would create the best dark out possible! In our previous house i made Roman shades from upholstery fabric. They worked well. My mom laughed at me standing in the fabric store with fabric over my head to see if it blocked the light.
Ok so this is totally awesome!! I’ve been into the whole sliding barn door thing for a little while now but I have never seen them used as a backboard/window shutters!! Shut the barn door;). love it.
Andrea´s last blog post ..Information on Sliding Closet Doors
I know this is an old post but I have been looking and thinking about doing this to our bedroom for a long time! My problem is the wall is about 10′ and the top of the window starts about 8.5′. (We live in a 100+ yr old house!) Do I cover the trim or do I place the door where the window starts? Also, what did you do to make sure it doesn’t hit the window sill?
I have just recently seen the barn doors on your Spring Bedroom Makeover! Just wanted to say ” they are fabulous!”. Love the whole bedroom!!
These would be great over a picture window in our cold Indiana winters!
These could be pretty done with French doors with stained glass film, a lace or frosted film, or lace, with rods top and bottom over the glass.
great job headboard looks much more prominent now love it
A great example of fine workmanship! Completely loved the way you explained through each step.
were they solid wood?
Love your work.
Keira Ball´s last blog post ..9 Pest Control Tips to Bug-Proof Your Home Like A Pro
Thanks for another excellent article. Where else may anyone get that type
of info in such an ideal manner of writing?
Hello. Thank you very much for such an interesting and really useful article. It seems to me that every person who wants to update the head of the bed here has something to emphasize. You’ve done a great job of updating your bedroom. I even took note of a few ideas while reading your article. As for the people who are going to do this, I think that the main thing is reliability in this design, because who wants to sleep in that bed in which the head of the bed is not securely attached. And if you are not sure it is better to hire a specialist, it will be safer for you.
Hi, Absolutely gorgeous!! What a beautiful bedroom. May I ask where your ceiling fan is from? I have been on the hunt for months for a new one for our living room. The way that you mention above to decorate the home is helpful for me. Thanks for sharing.Retaining Walls
Soooo beautiful photos))) Like!
Hi Myra,
Thank you for sharing your awesome DIY work that can help me a lot to decorate my home myself. I will follow your blog to learn your more DIY work.
Thanks again
Love it, This is very good information and I really enjoyed reading it, and also very helpful Much obliged to you for moving me to accomplish something incredible with my home. I bought item at http://www.angiehomes.co
The ChildCraft books!!!! Oh the memories they brought back! We had them in our class when I went to school too! Love that lantern and “gone swimming” sign too! That’ll be us in a month! Have a happy day, Myra!