Board And Batten Tutorial
I’m so thrilled to f-i-n-a-l-l-y be sharing our board and batten treatment with you! It’s taken forevah to get it done so I could show you. Other projects have taken top priority. A board and batten wall treatment is a quite simple, yet complex {read: time consuming} process. If you’re looking to add architectural interest and detail to your home, board and batten might just be the thing for you.
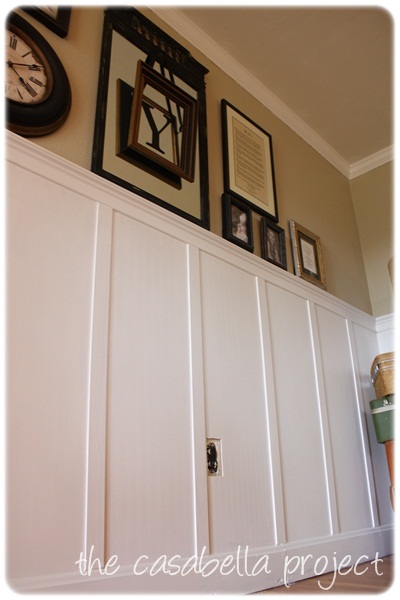
For our little cottagey casa, board and batten is perfect. Our walls are 60 year old plastered textured dry wall. The texture isn’t a nice texture…it’s old, cracking and hideous. So instead of being able to cut corners like many AMAZING home bloggers, we did it the hard way and installed both our boards and our battens.
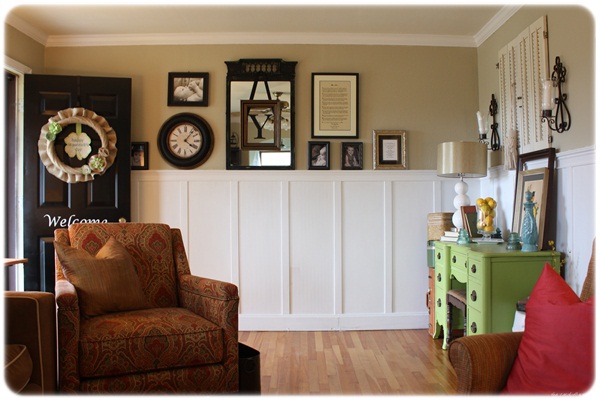
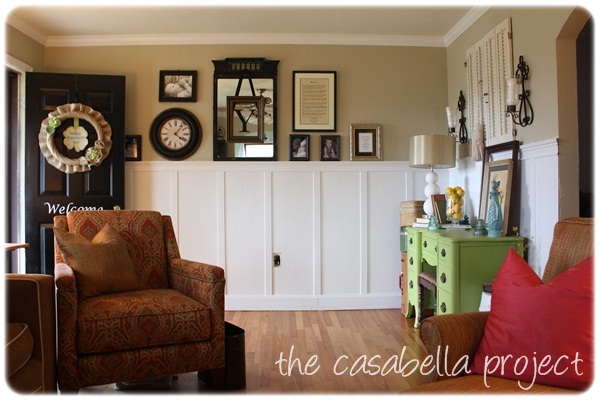
The difference that board and batten has made in our home is absolutely stunning.
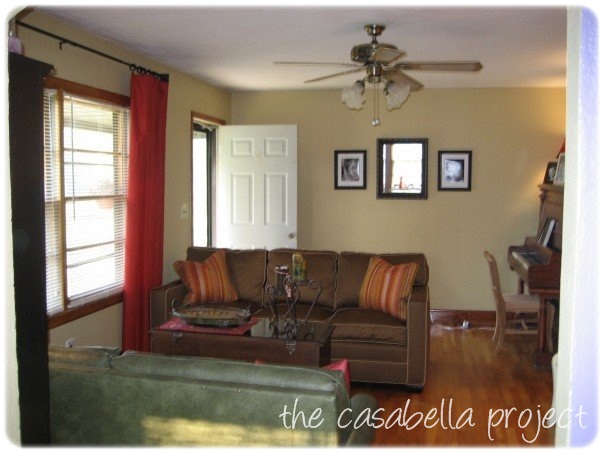
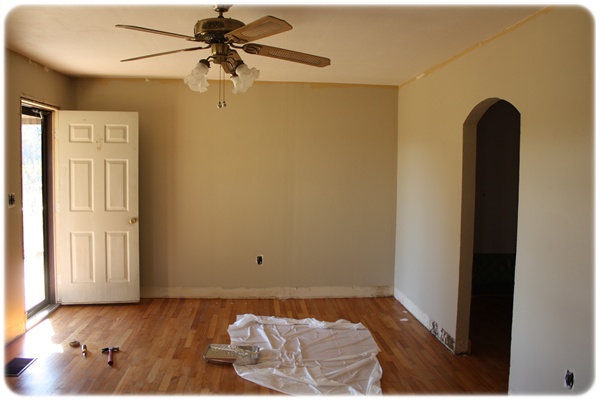
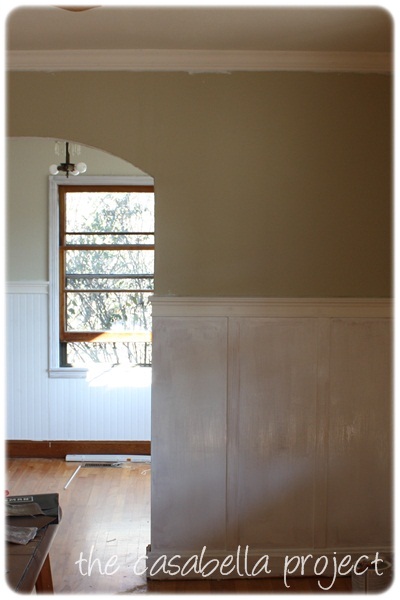
During – when we moved in the board and batten was primed.
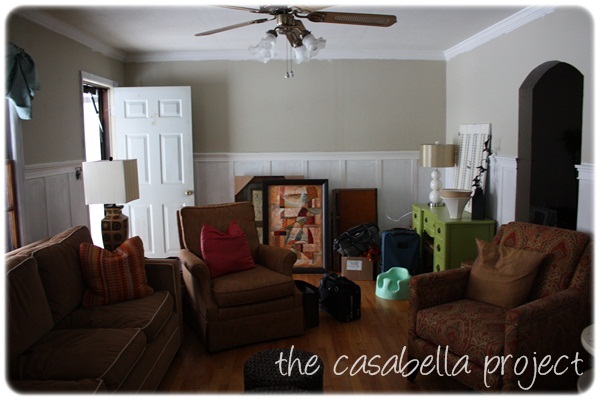
Just FYI, the paint looks incredibly gray in this picture that I took when snow as on the ground. It’s the exact same paint color that’s in the next picture. Crazy!
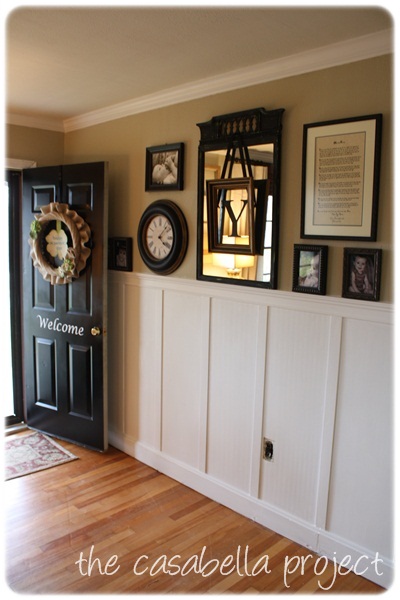
Today – I’m in LOVE! 🙂
This board and batten tutorial post is long, but hopefully easy to understand. We didn’t do everything right or the easiest way, so I’ll share some tips for you along the way.
After removing the baseboards, we painted the walls Sherwin Williams Ramie. Looking back, we could’ve saved time by painting the upper half of the walls {duh!}…but we’re learning as we go.
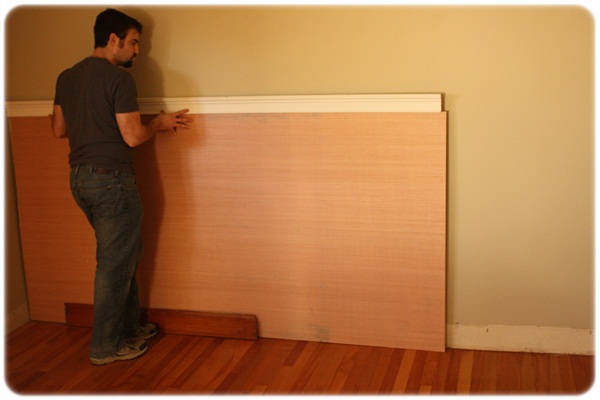
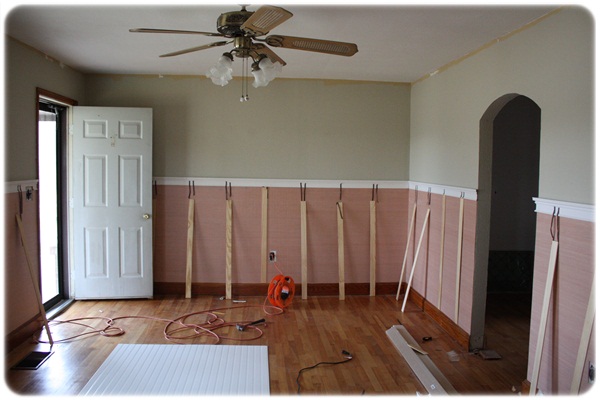
We bought 1/4″ luan at Lowe’s to install as the “boards” to cover the ugly, old textured walls. We also purchased a ledge type trim to use above the luan.
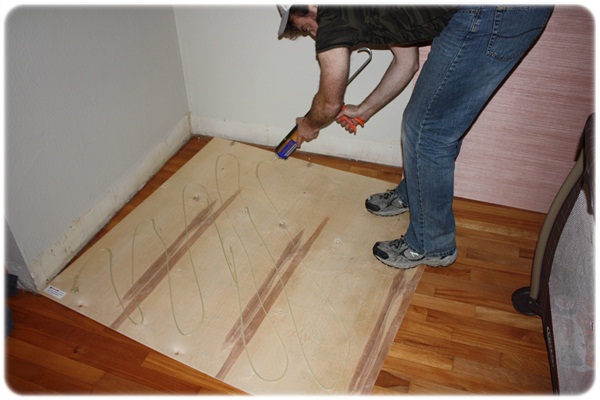
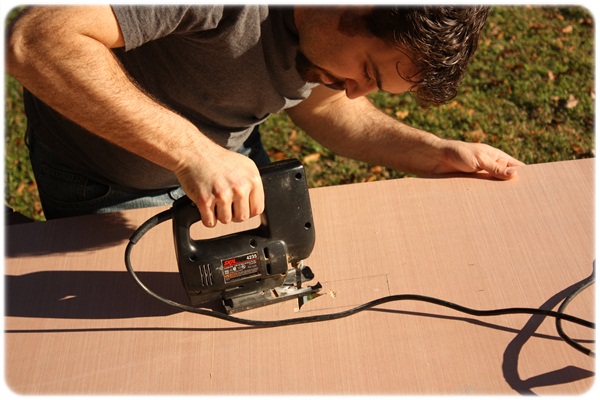
My hubs used the jigsaw to cut out around outlets and light switches.
After we reinstalled the baseboards and nailed up the ledge trim, I used floral tape {it was the only thing I had on hand} to mark out where the battens would go. I wanted to get them equally spaced, but also I needed to know exactly how many lattice boards I needed from Lowe’s.
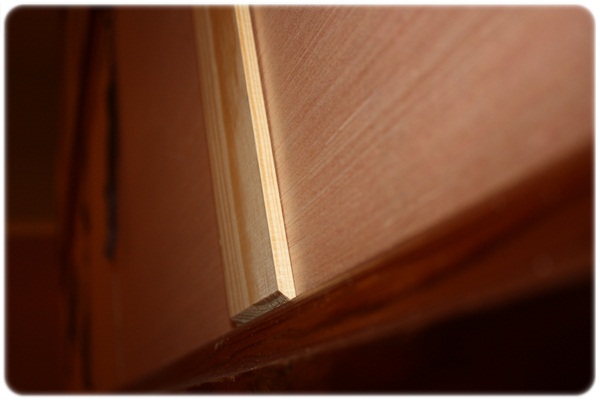
We angled the lower edge of the battens, so they would look nice against the baseboards. I learned this trick from Kimba’s board and batten tutorial! 🙂
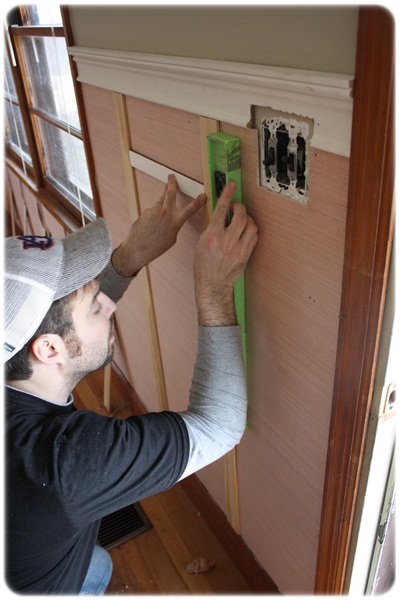
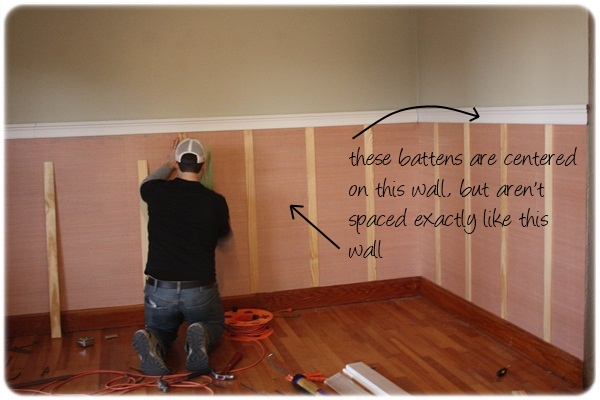
We used a spacer and level to make sure that the battens were equally spaced apart and exactly vertical. My hubs is an engineer…aka…math geek. In a few places, we centered the battens and equally spaced them instead of making them exactly equal all the way around the entire room. Just use good judgment to see what will look the best.
For example…
My brother and I sanded the caulked places, then I primed the board and batten with Zinsser primer. I didn’t know this at the time, but Zinsser primer is available in Zero VOC. Holla!
{swoon}
It’s starting to look so much better!!

Beautimous!
My husband and brother-in-law installed the crown molding with a nail gun. Can I just say that I’m in love with that thing? Amazing!
Here’s how it looks now. I still have a bit of touch up work to do and maybe, just maybe, I’ll add another coat of paint on the board and batten. We’re also going to add quarter round trim to finish off the baseboards.
Whew! We made it. I admire you if you’re still reading this long post! If we can successfully do a board and batten wall treatment, then you can too!!
Have a fabulous day y’all!
Linked to: Decor Chick’s Molding Party, House of Hepworths, Transformation Thursday, Show and Tell Saturday, Get Your Craft On, How-To Day and Remodelaholic!



Looks fantastic! And your tutorial was great and easy to follow!
Thank you Becki!! 🙂
It looks so beautiful, Myra! You guys did an awesome job and I loved your tutorial. Your lovely, real spirit always shines through your words and that’s one of my fave parts. 🙂
Sweet JessieLeigh, your comments are so so sweet! 🙂 Thank you for your kind words! 🙂
Beautiful! We still rent but I’m saving up ideas for when we buy our first home! I don’t know if we could do this, though. We’re not very “handy.” 🙂
Girl…y’all could SO do this!!! Many people use their walls (dry wall) as the boards, so all they add are the battens. It’s much easier and quicker than the way we did it because we wanted to cover up the texture. 🙂
Love it sooo much!!! You guys did a great job! It makes such a dramatic difference!!
Looks fabulous! I want to do this in our daughters room – I love the cottage/cozy feel it gives!
Love it! You did a great job! We did this about five years ago to our dining room and I’m ready to try it in another room! Haven’t tired of the look.
It looks awesome, Myra!! Totally loving the black door & pictures with it too. Now, when you get a chance, head over to southern Illinois, I need this in my bedroom and living room. 🙂
What a difference it makes in the room. It looks fantastic!!
myra this looks wonderful! 🙂 your hard work payed off ten-fold! I can’t wait to get this done in my husband’s bathroom – it is on the list of things to do this year… my only question – you just used liquid nails to adhere the luan to the wall and then uses nails on the batten parts right? did the nails fo the batten go through the luan and your wall? just curious! anyway – looks awesome! yay!
Myra, this looks awesome and the tips were so helpful. Even before I got married I knew I needed to revamp my then fiance’s home (probably about the same age as yours) and board & batten was definitely in my game plan but I had nooooooo idea how to even start. I’ve actually been waiting for this post because I knew you’d make it easy for someone like me to get. haha Thanks so much! I hope mine will look half as wonderful as yours. 🙂
Ummm….LOVE THIS!! So glad you showed how to angle the battens so that you could use your existing baseboards! I thought I was going to have to get rid of mine! Getting ready to start this project in my laundry room, but would totally LOVE it throughout my living room, kitchen, & hallway as well! I’m going to stumble this for future reference! Thanks Myra!
Looks amazing! We put the board and batten in our long hallway and it made such a huge difference in our home. I love it! Kind of feels like its own room. ALSO, I’m sure you’ve mentioned it somewhere before, but what is the paint color on your living room walls? I’m compiling a list of colors to choose from for my paint project and I really like yours! Thank you in advance!
Myra–Your room looks amazing! You did a great job and I love the way you have decorated! I love board and batten!
Love love love!
It is SO beautiful Myra!! It has dramatically changed your home and it’s lovely! Great tutorial too and I love that it’s the real boards! 🙂 Yes, y’all must invest in a nail gun too. 🙂
This was easy to follow. It looks GREAT and I am in love. I think this summer we are going to do this in our dinning room or boys room. Our home was built in 1918 so we are right with you on wall issues. Your home is comming together beautifully!
Fabulous! I am in the process of painting my entire main level in Ramie!! What a great neutral…just enough color to pop. I paired it with Nacre and painted horizontal stripes in our classroom/playroom/kid hangout space. LOVE IT! Maybe I’ll try the board and batten in my craft room 🙂
When are you coming to visit in Keller again?? I need some inspiration like you have!! Once the {taking-WAY-longer-than-planned kitchen project} is finished, I can move on to the rest of the house. I am desperate to love my home again. Right now I just resent it for being cluttered and ugly.
looks very nice! great job.
Love this. Love the green piece of furniture too…And I love that wall color. Can you give the name of it?
It looks wonderful! You guys should be super proud of yourselves… All that hard work will be something you can take pride in forever.
What a beautiful job you did! I am impressed and encouraged. Thank you for sharing. I am keeping my eyes out for kitchen ideas whenever you get back to it. (I assume the bathroom takes precedent for now!).
This looks amazing! I’m SO antsy to try some board and batten myself, but we’re thinking of moving this spring, so I’m TRYING to bide my time and just plan for it to be a part of the new house. But I’m not doing so very patiently 🙂
Myra,
That looks so awesome! What a difference you are making. You’re making quick progress on your sweet little home. Can’t wait to keep watching.
Love ya!
Denise
I am in major ‘like’. :o) Great job, it looks beautiful and I’m still in search of a desk like the one you found so that I can create one for my house too!
I Love this! I’ve never commented before, but have been looking at your blog for quite a while. I had a couple of questions…Where did you get your clock? I love it! and also did you make that wreath on your door…from what I can see I love it too! If you did do you have a tutorial? 🙂 Keep up the good work. I’m enjoying your progress!
Beautiful wall treatment. It looks so good, and I love the decorations on the wall above it. Nice work with the layering! Gorgeous.
This is an amazing transformation!!! Well done and a great tutorial!!!
looks wonderful, makes a huge statement in this room. i have a party going on if you would like to share this, i would love it if you did.
http://typeadecorating.blogspot.com/2011/03/anything-goes-party-8.html
What a HUGE project with extraordinary results! So glad to find you today. Congrats! Very well done!!
Looks beeyoutiful! Y’all did a really good job.
looks Great! I really have to talk my husband into doing this in our bedroom!!
WOW!!!! It looks incredible!!!!
This is so darling I love it! Thanks for sharing!
You guys did a great job it added so much detail to a flat wall. love above too way to go oh and the crown moulding, I want to do that in my house. Saw this on Decor chick glad you linked up.
-Lindsay
countrygirlhome.blogspot.com
You make it look so simple! I would love to do this in our house, but I am not ready to commit to painting our trim… It looks beautiful.
Myra,
I love it! We are doing this in the bathrooms and maybe the living room. I just love the feel that it brings to the whole room.
Cherie @http://dragonfliezcreationz.blogspot.com
This is amazing! You did a fantastic job on the project and the tutorial.
http://www.itsybitsypaperblog.com
Looks so good! I love board and batten. We just did it in our study (well my husband did 🙂 Great job!!
So nice! I like your choice of colors, I may have to check out Ramie at SW. I’m trying to decide what color to use in my living area…I want a neutral that’s not too dark and not too yellowish and not too gray…so I’m in the struggle phase :\ Thanks for the inspiration!
Your room looks lovely, and I can’t wait to try this in my family room! …Just waiting to slipcover the couch and loveseat first!
About bubbles in your paint…I have had the same problem, and I *think* I know what causes it. If you don’t completely soak your roller in paint, there is air trapped in it underneath the paint. As you roll onto the walls, you push the trapped air out into the paint, and it leaves the bubbles. I think the solution is to completely squeeze paint INTO the roller, like water into a sponge. Then there is no room for air!
so amazing. I have bookmarked this for my husband!
megan
craftycpa.blogspot.com
That turned out fantastic! I am wanting to try this in my home but am so scared… it looks like a lot of work!
Wow it looks GREAT!! Love this! I’d love for you to link it up at Sundae Scoop
Gorgeous! Thanks for sharing, what an awesome transformation.
I am TOTALLY inspired. We have a house built in 1884. The walls are hideous! I had planned on doing beadboard in several rooms… but after reading your tutorial, I think board & batten might be easier and cheaper!
I just found your site and I love it, love it!! Love your board and batten!
Norma
Thank you Norma!! I’m so glad you found me!! 🙂
Fabulous. We have the exact same idea for our living room. May I ask how tall the finished product is. I would like to do higher than a chair rail and more like a dinner rail, but I’m struggling with the height and really like yours. How high is the finished product?
Hi Dru! 🙂 The total height is 52″. I hope that helps you out!!
I just found your blog and loving your style. The board and batten makes a huge difference. We are moving into our new home soon and can’t wait to do this to my home..just scared that I might want to do it all over! I may need someone to hold me back! Hehe. Great job!
Hi Jovana! Board and batten is addicting! I might do it all over my house too! LOL!
This looks AMAZING! WOW! Spectacular job. I sent your link to my handy man for an estimate…love it! I would love to do this myself, but we have a serious time issue at my house! I juts LOVE it and your design looks awesome!
Stacey :o)
Thanks Stacey for your sweet comment! Let me know what your handyman says!! 🙂
Thanks for the awesome tutorial!
I’m going to be tackling my own board and batten project soon, so this has been so helpful!
Thank you!
Andrea
We have SW Ramie throughout most of our first floor. It’s such a great color! Your board and batten looks awesome. I’d love to add your entry pics to my inspiration galleries and include you in a feature post. Let me know if you’re interested!
Jena, that sounds wonderful! 🙂 Feel free to email me! 🙂
Where did you find your batten boards (i.e., lattice strips) at Lowes? I have gone to the store but didn’t find any at our local store. Yours looks great!!!
So well done! Thanks for breaking it down step by step, I’ve always loved the look and now feel like I can accomplish this in our dining room. If I may ask, did you cut each batten or were you able to buy them that width? I saw on the blog you tagged they used MDF, but that doesn’t appear to be what you used. What material did you use and would you choose it again? Thanks for your help. Can’t wait to have this look in my own home!
Hey Kelly! Thanks for your comment! 🙂 We used lattice strips from Lowe’s. I don’t remember where in the store we found them, but I think it’s in the lumber section. I’m sure you can just ask someone when you go in. They worked like a charm! 🙂
Nice work! Not as simple as you made it look. This would work well in a nursery with lighter tones or darkened in a den.
Hi Myra-
Thank. You soo much for the tutorial! We are getting ready to tackle this project ourselves and this post really put us (me) at ease! 🙂 will you be doing this in the new Casa??
I would love to do a Board and Batten treatment in the new casa. We shall see! 🙂
Looks so great!! I love the pics/mirror you put above it in the entry way as well. Our last name’s initial is Y too so I think it’s making me biased toward using the “y” mirror idea 🙂
Hi Myra – Just stumbled upon your blog via Pinterest. I’m digging your new walls and can’t help but wonder if you covered a doorway? You didn’t mention it in your post so maybe I’m confused. Anyway, if you did, I want to say it’s the most clever, non-permanent way to hide a doorway! Great work overall… 🙂
Can you post a pic of the wall with the window in it? I’d love to see how that wall turned out, I’m stuck figuring out how to artistically make my walls with windows work with this. You make it look so easy! Great job. I love that you made them tall.
Wow this is just amazing, I love it. Thanks for the tutorial. I wonder if I can get the husband to pull the furniture out of the living room so I can do this before Christmas. Hmmm, DOUBTFUL.
THANKS AGAIN
Kat
I love this project! Thank you for sharing it with us! What was the total out of pocket cost to do this?
Jennifer´s last blog post ..BEE My Valentine
How much was the total for materials?
Hi! I love the board and batten in this room. Our walls are good, so I might try just adding the vertical pieces in between our chair rail and base molding, and painting the wall white. Hope that will work!
MomHomeGuide´s last blog post ..Readers’ Favorite MomHomeGuide Posts
Wowee!! I can’t wait to try that myself. Looks absolutely beautiful. Great job:).
Jackie
jaclyncolville.com
Looks great! I have seen these boards at Lowes. Do they paint smooth or does the wood grain come through?
Thanks
Beautiful! Thanks for this. If you ever damage your wall or ceiling, a repair is essential to resolve the problem instantly so the damage won’t get worse.