Ruffled Muslin Wreath Tutorial
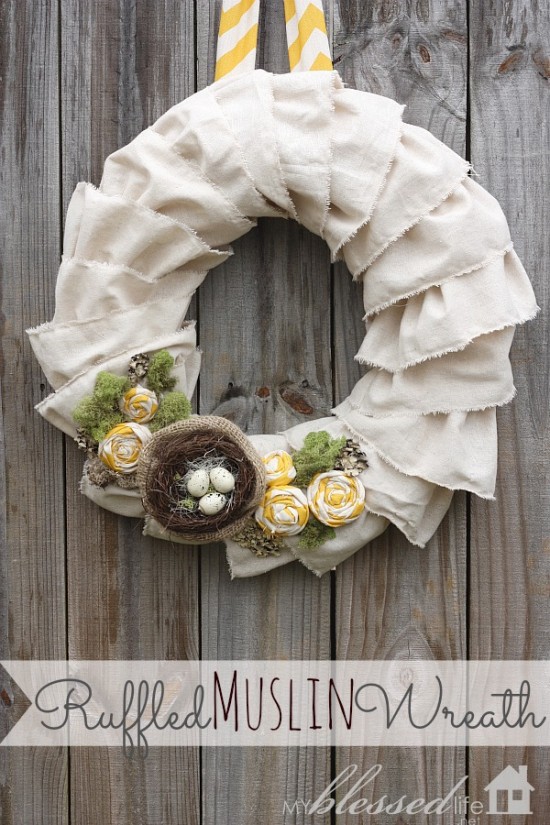
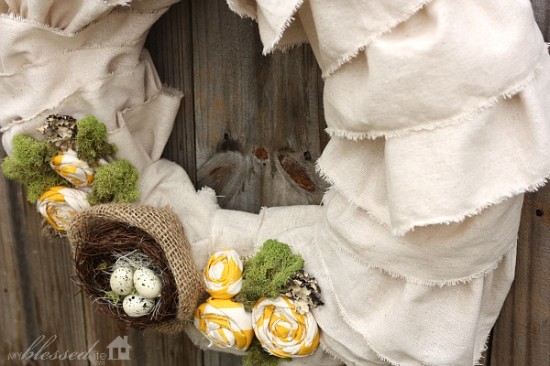
Happy Monday! After a few crazy weeks, it feels so good to finally have a new project to share with y’all. I decided to combine the concepts behind my Ruffled Valentine’s wreath and my Burlap and Lace wreath. So, I ended up with a Ruffled Muslin Wreath!
I adore how it turned out! It’s perfect for Spring and early Summer. The feminine ruffles combined with the nest, moss and rolled fabric flowers are so fun. This wreath is super *easy* to make, but…the ruffles are time consuming. 🙂
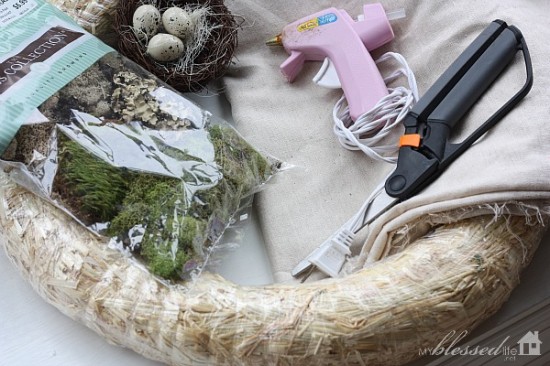
Supplies Needed:
- Straw wreath {or a pool noodle taped together}
- 2 yards muslin {or other fabric if you so desire}
- Moss
- A faux bird nest
- Fabric scraps for flowers
- Scissors and a glue gun/glue sticks
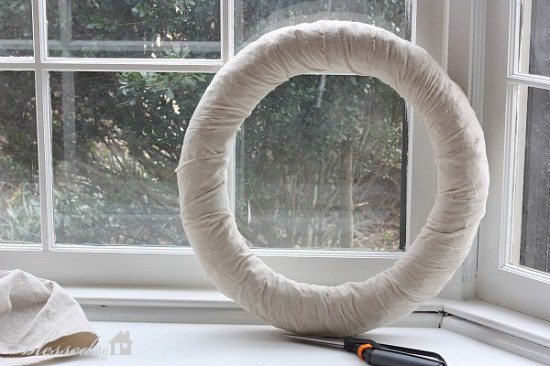
Begin by ripping 3″ strips length-wise {parallel to the selvage} down the muslin. I used about 4 strips to wrap my 18″ straw wreath form. Use hot glue to secure the fabric.
Next, rip 5″ strips the same way until you have six 5″ wide strips. Ridley LOVES helping me rip fabric. 🙂
Sew the strips end to end to make one very long piece of muslin. Then use a long basting stitch about 1/2″ in from one edge of the long strip for the entire length of the fabric strip. This is your gathering thread and it’s totally fine to use a contrasting thread…mine was gray.
Carefully loosely gather the muslin. Don’t tug or pull on it too hard, or the thread will break and you’ll have to start over. I decided to go from one end to the middle and then from the other end to the middle. Does that make sense?
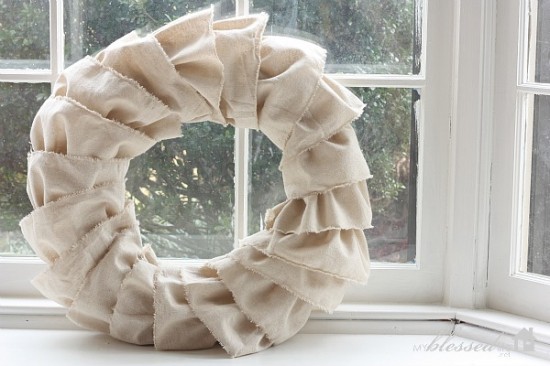
There will be strings, strings and more strings, but never fear. After the muslin is gathered loosely, secure one end and begin carefully wrapping the wreath form. Each time you wrap, you have to adjust the ruffle just so to hang over the last one. This is *NOT* hard. It just requires patience. 😉
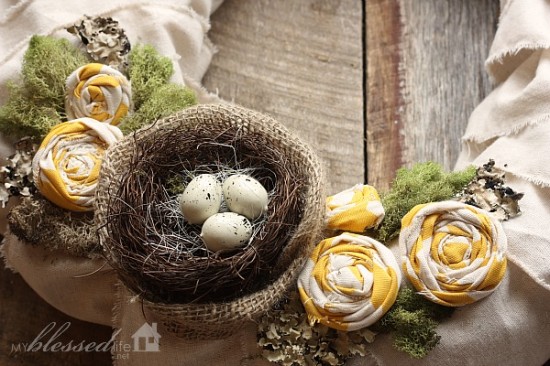
Then, glue on the bird nest. I added a bit of burlap ribbon behind the nest to give it more definition. Then I added some rolled fabric flowers {tutorial here} and moss.
*Note: Because of the layers of the ruffles, you may have to glue down some of the ruffles to make sure your embellishments are secure.
Pretty!
That’s all there is to it! My Ruffled Muslin Wreath is hanging on my front door. Love it!
Do you have a Springtime Wreath on your front door?
xoxo
Myra
Sharing at: Tips & Tutes, Chic & Crafty, I’m Lovin’ It, Before & After Party!


Simply beautiful! Your wreaths are always stunning!
Ariean K´s last blog post ..What’s New This Week…digital memories
I need some spring in my life since the weather doesn’t feel like spring! This would at least make it look like spring – it’s so pretty!!
Deborah´s last blog post ..Whole Wheat Blender Pancakes {and a Blendtec Giveaway}
I am loving the basket with the little eggs.
Seriously Sassy Mama´s last blog post ..My Word For Monday = Lazy
This is so pretty, Myra! I love the extra details of the flowers and the bird’s nest!
Laura / The Shed blog by Pet Scribbles´s last blog post ..Mad Writing Skills, a Must-Have Guide for Creative Bloggers
This looks beautiful Myra! I absolutely love the little nest and flowers 🙂 So cute.
I was so excited to see your spring wreath today! I’ve loved everyone you’ve made but I have to say I think this one is my favorite!!
Tabitha´s last blog post ..Banana Pancakes with Honey Yogurt and Berries
Your wreath is beautiful! So soft and springy!
Kathy´s last blog post ..Skillet Focaccia
I love it! So cute and I love the pop of yellow!! I want to make one now 🙂
Katie´s last blog post ..Weekly Menu – Whole30
I really like this wreath! I am pinning this on my craft board! You have such cute ideas.
Erika Roberts´s last blog post ..Showing Compassionate Intolerance While Living in the Real World
It’s beautiful!
This is so pretty! I love it!
Its so adorable Myra!
Amanda´s last blog post ..Food Styling Challenge: Inspired by Charm
I need a new wreath for my door so bad! I LOVE this Myra!
Thanks for linking up, I featured your post in my wrap up http://tidymom.net/2013/8-creative-ideas-for-home/
Happy Easter!
TidyMom´s last blog post ..8 Creative Ideas for Home | I’m Lovin’ It Features
Wonderful idea….here’s a trade back–Use dental floss for the gathering thread, no more breakage!
Absolutely adorable!
Lisa @ Stop and Smell the Chocolates´s last blog post ..Stop and Write a Blog Post {A Blogging Challenge}
Lovely Wreath! Simplicity is best! Love it so much! Plus, Recycled Wreath? Smart Move!
Maria D´s last blog post ..What Causes Hemorrhoids?
Myra , this is such a wonderful idea! I will definitely try this! I want to invite you to my site to get more ideas to home styling: http://timetobuild.co.il/ enjoy!
anni´s last blog post ..עיצוב ×¤× ×™× – למי ×–×” מת××™×?
Just discovered your blog through Country Woman magazine. (Somebody just donated it to my local library!!)
In reviewing your remodeling posts and some of your history, I presume your shiplap is authentic. If so, did you use a backer behind it?
We are starting on a major remodeling project of our 1904 home and need to replace some of the older board walls that have water damage. We want to try to blend the present walls (ours are tongue and groove, not shiplap) with the new.
Thank you.
This would make a lovely Mother’s Day gift!
Melanie´s last blog post ..How to Host a Mother’s Day Tea Party: Part 2 – Decor & Gift Ideas
Everything is perfectly placed on your wreath. I really like it!
I love this wreath! I am going to make mine using an old drop cloth for the ruffles and I’ll add a “hanger ribbon” to match the flowers which will go with my aqua/teal decor. Love the bird eggs! Thank you for sharing the ruffles and how to make them.